
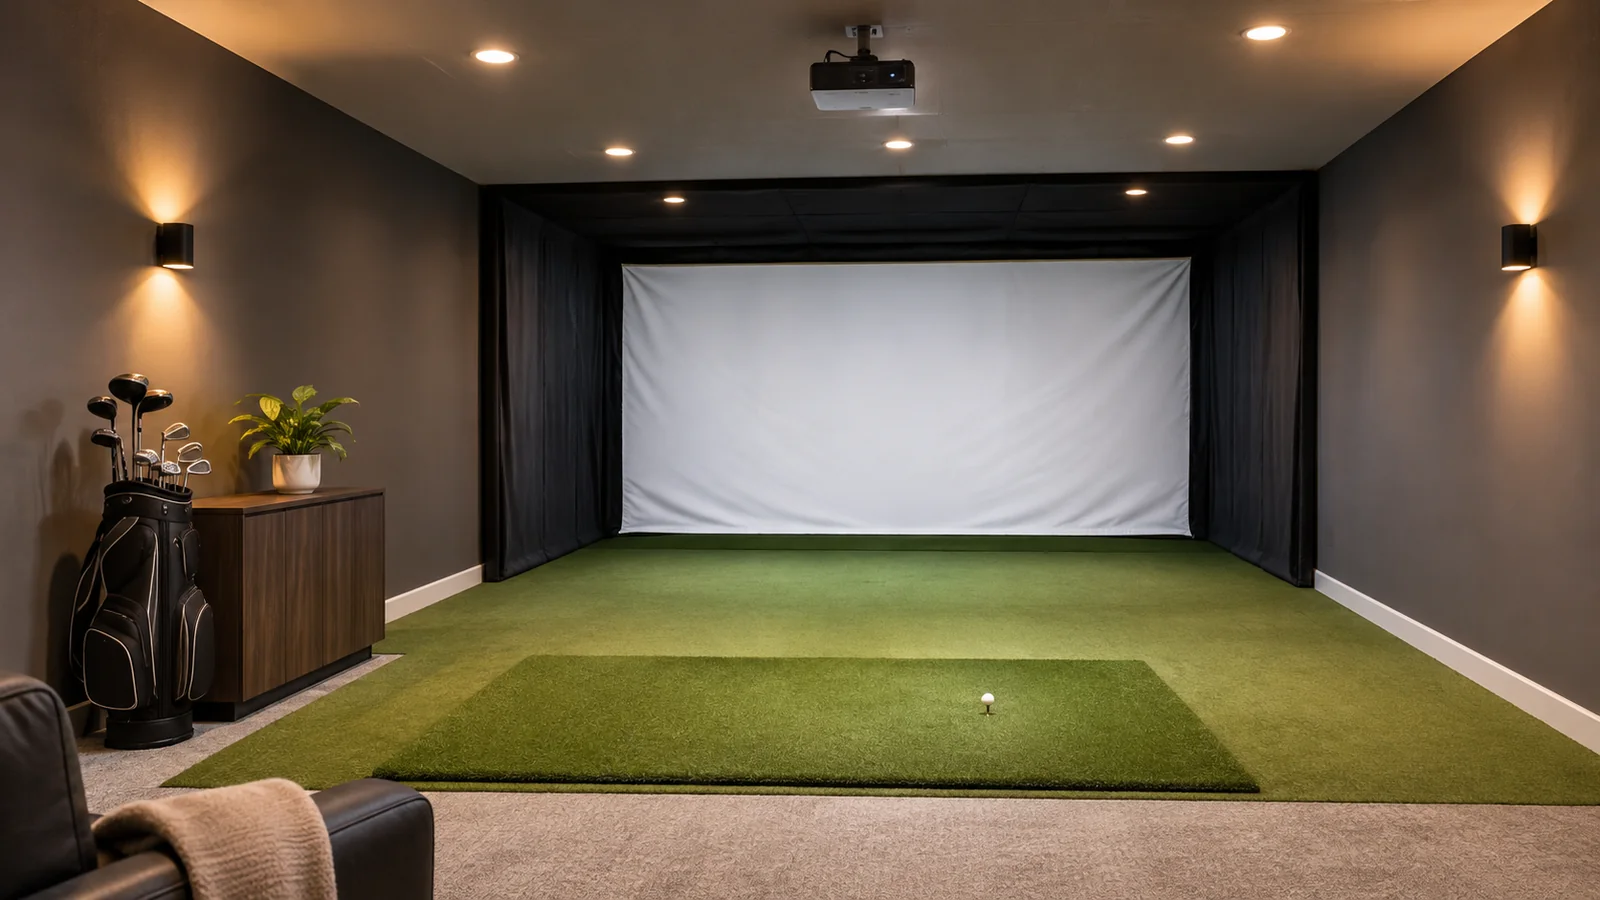
Before buying a launch monitor, projector or impact screen, measure the space where you plan to swing. A golf simulator is not simply a screen that fits against the garage wall. You need enough clear ceiling height for a full follow-through, enough width for your body and club to move, enough depth for the ball and tracking device, and protective space behind and around the screen. When one of those pieces is missing, more expensive technology cannot fix the room.
This guide explains the dimensions that matter, shows how different launch-monitor designs change the floor plan, and gives sample layouts you can adapt. The numbers below separate manufacturer requirements from general planning allowances. No universal room size guarantees safe swinging for everyone: height, swing plane, handedness, club length and enclosure construction vary.
Quick verdict: Many adults find 9–10 feet of unobstructed ceiling height a more realistic planning target than an 8-foot ceiling, but your own longest-club swing must be checked. A rear-radar device may need about 15–17 feet between sensor and net/screen before screen stand-off and walkway allowances. Side-positioned camera monitors can reduce sensor-related rear depth, but they still require a full, protected hitting lane. There is no honest one-number minimum for every simulator.
Golf Simulator Room Size at a Glance
| Dimension | Practical starting discussion | Why it changes | Check before purchase |
|---|---|---|---|
| Clear ceiling height | Often target roughly 9–10 ft or more | Player height, driver swing, beams, projector mounts | Swing through without contact or near-miss |
| Usable room width | Many single-golfer bays start around 10–12 ft; shared handedness can need more | Off-center hitting, shanks, side barriers | Full left/right swing and device placement |
| Total depth | Depends heavily on tracking system | Radar sensor behind ball; flight to screen; rear screen gap | Exact manufacturer’s measuring geometry |
| Ball-to-screen distance | Device-specific; some radar models require at least 8 ft | Needed ball flight for shot capture | Model’s indoor guidance and net protection |
| Behind-screen space | Depends on screen/net manufacturer and mounting | Stops wall strikes and unsafe rebound | Exact screen stand-off and backstop specs |
| Projector throw | Lens-to-screen distance = image width × throw ratio | Screen aspect ratio, mounting, shadows | Manufacturer lens range and safe mounting point |
These are planning discussion ranges, not building-code standards or substitute safety certifications. Dimensions such as 10–12 ft wide are common design targets—not universal minimum specifications.
The first distinction: room dimensions versus usable dimensions
A garage described as 12 feet wide may have less usable space after shelves, wall trim, a parked vehicle, exposed studs and safety padding. The ceiling might be 10 feet at the center but much lower where a door track crosses your follow-through. Similarly, a room can measure 17 feet long and still fail the layout if the screen must stand a foot or more off the back wall and the golfer needs access behind the hitting mat.
Measure the finished clear height at every part of the swing path, not merely floor-to-joist at the highest point. Mark wall-to-wall depth on the floor, then add the actual screen plane, tee position and launch-monitor location. Treat every obstacle as part of the dimension. Include the projector housing and mount, hanging lights, sprinkler heads, pipes and ceiling fans. A flush ceiling LED may be acceptable in one location while a suspended fixture becomes a strike hazard.
Your ideal bay should also leave space to move between shots without stepping onto a loose mat or into the sensor’s path. A narrow aisle behind a rear-mounted radar unit is particularly easy to overlook. If you have a second user or a child in the room, plan a designated position that is completely clear of the hitting zone.
Ceiling height: why 8 feet is often too tight
Eight-foot ceilings appear in some launch-monitor minimum specifications, but that should not be read as a promise of safe driver swings. Garmin lists 8 feet among the minimal room dimensions for R10 setup; it separately tells users to ensure the club’s backswing and follow-through cannot hit anything. The device’s ability to measure a ball and the player’s ability to swing safely are separate tests.
Golf simulator projector manufacturer BenQ describes about 9 feet as an ideal ceiling height, while acknowledging that anything below that can be restrictive. In practice, a tall golfer with a steep swing or a longer driver may need 10 feet or more. Shorter irons and partial wedge shots may be possible in spaces where a full driver swing is not. But if you can swing only by artificially shortening your motion, the room is not a good full-bag simulator for you.
A safe trial starts with an unloaded, slow-motion swing of the longest club you intend to use, with someone watching from a safe location. Progress gradually without striking a ball until you are confident the club will not hit beams, lights or the projector. Do not use a test that requires standing closer to a wall than you would during real play. For shared rooms, repeat with each golfer’s actual swing and both right- and left-handed setups.
Sloped ceilings, garage rails and overhead monitors
Vaulted ceilings can be misleading. A room that reaches 11 feet at the ridge might provide only 8.5 feet over the golfer’s lead shoulder. Measure the clear height above the actual stance and follow-through, not at the center of the screen. Side-hung garage tracks, door openers, brackets and storage lofts can create obstructions even when the floorplan looks generous.
An overhead launch monitor also consumes part of the upper room volume, potentially requiring a manufacturer-defined mounting height and horizontal offset. Do not assume the camera will work if installed at any height. Check the exact sensor’s mount drawing and allow for projector placement separately. A floor-standing side camera can be a better option when overhead hardware conflicts with clearance.
Width: room for the full club arc and error shots
Width is not determined by the impact-screen width alone. A right-handed player swinging from the middle of the room may have a different clearance requirement from a left-handed player using the same mat. For a shared bay, it may be necessary to center the ball while moving the stance, or reposition a side-mounted camera. A wide enclosure helps capture occasional misses but is not a substitute for side-wall padding or a safe swing path.
As a planning exercise, many single-golfer installations begin around 10 to 12 feet of clear width; more space is helpful if you want both handednesses or a central tee. These figures are not universal manufacturer requirements. Use cardboard or tape to mark the left and right boundaries of the club arc and check that the golfer can swing without contacting either side. Include the thickness of wall padding and any supporting frame inside the room dimensions.
An off-center hitting position can solve an asymmetric room when only one handedness will play. That may complicate the image composition and putting line, but safety and a comfortable swing take priority over perfect visual symmetry. If the monitor is side-positioned, verify that the ball can remain in its exact camera hitting zone after moving the mat. A hardware platform cannot compensate for the ball being outside the capture area.
Depth: add every required segment rather than guessing
Depth has more device-specific variation than width or ceiling height. For rear-radar monitors, the two big segments are sensor to ball and ball to net/impact screen. After that, add the screen-to-wall stand-off and any practical space required to protect the sensor or move around it. A side-positioned optical monitor does not need the same sensor-to-ball rear segment but still needs ball flight to the screen for safety and software behavior.
The design equation is:
Total room depth needed = rear equipment allowance + sensor-to-ball distance + ball-to-screen distance + behind-screen stand-off + any usable access clearance.
When a side camera does not occupy a long rear segment, the effective sensor-to-ball distance is a different side placement measurement. Do not add a fictitious seven feet behind the ball for a side-camera product. Conversely, do not delete the behind-screen gap just because the net fabric looks thick.
Example A: Garmin Approach R10 room geometry
Garmin’s official R10 guidance specifies 6–8 feet behind the tee for the monitor and at least 8 feet between ball and net. That means 14–16 feet from monitor to screen based on those two segments alone. Garmin also publishes a minimum 15-foot room length in its general setup guidance. These are not a license to jam the impact screen against drywall: the screen or net manufacturer’s stand-off and the rest of the room layout still need to be accounted for.
Imagine using the shortest published monitor offset of 6 feet, 8 feet of ball flight and a screen that needs 1 foot of back clearance. The planning sum is 6 + 8 + 1 = 15 feet, before any additional rear circulation or frame depth. With the monitor 8 feet back and the same screen clearance, the sum becomes 8 + 8 + 1 = 17 feet. The 1-foot stand-off is an illustrative design assumption, not a Garmin-approved screen specification. Your actual screen may require more.
Example B: Rapsodo MLM2PRO room geometry
Rapsodo publishes 6.5–8.5 feet from the MLM2PRO to the ball and 8 feet of ball flight to the net for indoor use. That produces 14.5–16.5 feet between the unit and the net before screen stand-off and other allowances. Its FAQ notes taller golfers may need more rear room to get the full video framing. A 15-foot room is therefore potentially restrictive even if it looks adequate from a tape measure.
Build around your intended mode and accessories. If you want measured spin and spin axis from an MLM2PRO, Rapsodo’s RPT ball requirements also matter, but they do not change the room geometry. Adding a projector changes the display setup, not the rear radar distance. See our MLM2PRO review for the data and membership trade-offs.
Example C: FlightScope Mevo Gen2 room geometry
FlightScope lists 7–9 feet behind the ball for full-swing use and 8 feet of limited ball flight as a minimum. The combined sensor-to-screen segment is therefore 15–17 feet, then add the actual screen clearance. The manufacturer separately discusses marker dots or suitable radar-tracked balls for accurate indoor spin measurements. The best setup is one with repeatable alignment and enough room to keep the monitor out of foot traffic.
Example D: side-camera systems such as Square, SKYTRAK or Garmin R50
The critical difference is that a side camera can track the shot close to the ball without placing a radar sensor seven or eight feet behind the tee. Garmin’s R50 documentation, for instance, positions the unit approximately 1.5 feet to the side of the tee location. That changes how you budget rear depth, although it does not set a universal ball-to-screen minimum for every camera-based unit.
Side cameras introduce other geometric conditions: the ball must land in a defined hitting window, the monitor must be oriented and leveled or calibrated correctly, and the camera needs a suitable lighting environment. A left-handed user may require a different setup. Do not apply an R50 side offset to Square or SKYTRAK; obtain the mounting geometry for the exact product edition.
Three example room layouts
Layout 1: a compact room, around 12 ft deep
A short room is generally a poor candidate for rear-radar systems that require about 15–17 feet between monitor and net. A side-positioned camera may be worth investigating, but first check whether the golfer can stand far enough back from the screen for a safe swing and whether the impact material has adequate space behind it. A 12-foot-deep room is not automatically safe simply because the tracking device needs no rear radar runway.
In this situation, consider a TV to the side instead of immediate projection. A full enclosure may take more depth than a net, while a high-quality net and side barriers can sometimes be arranged more efficiently. The safe solution depends on manufacturer requirements, not a generic blueprint.
Layout 2: a mid-depth garage, around 16–17 ft
This space might work for some rear-radar configurations if monitor distance, screen stand-off, golfer path and door hardware all fit—but 16 feet on a property listing does not mean 16 unobstructed feet in use. Before purchasing the R10 or MLM2PRO, draw the layout to scale with the actual manufacturer placement range. Leave room behind the net as its vendor specifies; a garage wall should not act as the first stop for a full-speed ball.
If the screen ends up close to an overhead door, examine how the door moves and where its hardware sits. Do not position a ball-flight capture area where an open garage door, its panels or tracks can strike the enclosure or be struck by a club.
Layout 3: a large permanent simulator bay, around 20 ft or more
Greater depth provides flexibility for rear-radar geometry, a more generous landing area and projector positioning. It also allows access for maintenance, so you can replace a hitting strip, adjust a camera or clean the impact screen without dismantling everything. This is not a universal recommendation to buy a 20-foot room; it simply gives a more forgiving canvas for many combinations of hardware.
In a roomy installation, consider future left-handed players, children and visitors. Aim for a consistent tee position, floor-height transitions without trip hazards, and protection around every plausible miss-hit direction. The screen’s dimensions, projector image and monitor sensing zone should all align to the same reference centerline.
Projector placement: avoid the common throw-ratio error
A projector’s throw ratio describes how far the lens must be from the screen compared with the projected image width. For a fixed ratio, the relationship is:
Throw distance = projector throw ratio × projected image width.
If a lens has a stated throw ratio of 0.8 and you plan a 10-foot-wide image, the nominal lens-to-screen distance is 8 feet. If you change the projected image to 12 feet wide, the distance becomes 9.6 feet at the same ratio. These calculations are illustrations; actual models can offer zoom, offsets and lens-shift constraints.
The critical distinction is that the image width is not necessarily the fabric width. A screen with an outer frame, protective borders and a usable central picture may have a smaller projection width. If you purchase a 16:9 projector but display 4:3 imagery, calculate using the active image area, not the listed frame dimension. BenQ’s golf simulator planning guidance explains the throw ratio and how aspect ratio affects placement.
Mount the projector outside likely club and ball paths and use its installation instructions for ventilation, structural support and cable routing. A floor projector needs robust protection; an overhead projector must not intrude into the swing plane. Shadow position is another practical issue, but solving a shadow by moving a projector into danger is not acceptable.
Screen and net clearance is a safety measurement
An impact screen moves when hit. The amount depends on material, mounting tension, ball speed, distance from tee and any cushioning or backstop. A very tightly stretched surface may rebound more aggressively; loose fabric can also create unpredictable behavior. Follow the screen and enclosure manufacturer’s actual mounting and backing instructions and consider professional installation for a permanent studio.
Plan for more than perfect straight shots. A shank, high wedge, topped ball or rebound may miss the central impact zone. Side netting, overhead coverage, padded frame edges and a floor landing strip reduce the chance of a ball hitting a hard wall or the player. Golf balls can still ricochet. Keep spectators well away from the hitting lane and inspect netting periodically for abrasion and tears.
Never substitute a standard projection screen or household curtain for impact-rated material. The fact that a camera can track a shot in a short space does not make the physical shot safe to hit there. Safety engineering remains a separate requirement.
Room-fit worksheet: measure the unusable spaces too
Measure the room at the actual ball position rather than relying on the largest wall-to-wall dimensions. Record three widths: the clear swing arc on the golfer’s left, the clear swing arc on the right, and the available width for a catching surface. A 12-foot room with a protruding column, water heater or overhead garage track may provide much less safe usable space.
| Measurement | What to record | Why it matters |
|---|---|---|
| Hitting-point ceiling | Clear height directly above the ball and through the follow-through | A high ceiling elsewhere does not make a restricted swing safe |
| Ball-to-screen | Actual flight path to the impact surface | Some radars need at least 8 ft of travel before the screen |
| Sensor-to-ball | Distance required for your exact monitor, including stand | Rear-facing radar has a measurable depth cost |
| Screen-to-wall | Maker-required space for screen deflection and frame protection | Prevents false assumptions about usable depth |
| Left/right safety | Swing and mishit containment for both handednesses | Protection may change when a second golfer uses the space |
Worked geometry: Garmin specifies the R10 6–8 ft behind the ball and at least 8 ft from ball to net. These segments alone use 14–16 ft, before any additional back-wall, screen-deflection or safety allowances. Garmin’s published baseline room envelope is 15 × 8 × 8 ft (length × width × height); that baseline is not a guarantee that a tall golfer or long driver swing will clear a ceiling or a garage door track. Use your measured swing footprint and the exact enclosure instructions before ordering.
Exit rule: if a safe driver swing is not possible, do not compensate by standing closer to an unprotected screen. Reconsider the club selection, monitor type, room or entire installation.
How to measure your room in ten minutes
- Measure the shortest clear floor-to-ceiling dimension over the whole swing route, including door tracks and light fixtures.
- Measure usable width at the mat height and at shoulder/club height; note cabinets, brackets and frames.
- Mark the actual intended screen plane on the floor; add the manufacturer-required screen-to-wall clearance.
- Mark the ball or tee location and verify the player can make a safe, controlled full swing without any overhead or side contact.
- Mark the model-specific launch-monitor location and sensing area; add rear access and wire routes.
- If using projection, calculate the active image width and lens throw distance using the projector’s published ratio range.
- Check handedness changes, spectator zones and where balls might bounce or roll after impact.
- Photograph the measured floorplan for comparing with the monitor’s manufacturer setup diagram before buying.
Do not rely on verbal measurements such as “a standard double garage” or “a ten-foot ceiling.” The placement of one beam or door motor can be the deciding constraint.
The ProTee VX review explains an overhead installation path. Use the shed planning example to see how screen reserve, ball flight and rear radar depth add together.
Frequently asked questions
Is 8 ft of ceiling height enough for a golf simulator?
It may satisfy the minimum listed for certain devices, but it is often restrictive for a full driver swing. Treat the individual golfer’s longest club and complete swing path as the deciding test. For many adults, around 9–10 ft of unobstructed clear height is a more comfortable starting target.
Can I build a golf simulator in a 10 × 10 ft room?
A small, carefully designed practice space may support some short swings or side-camera tracking, but a full-bag, full-speed simulator is not assured by those dimensions. The screen still needs protection and the golfer must be able to swing without striking walls or ceilings. Consider the intended activity before buying equipment.
How far should the ball be from the golf simulator screen?
That depends on the launch monitor and the screen installation. Garmin R10 and Rapsodo MLM2PRO both specify at least 8 feet of indoor ball flight; other camera systems can have different requirements. The screen manufacturer separately determines safe stand-off, mounting and backstop requirements.
Which golf simulator needs the least room behind the ball?
Side-positioned optical monitors typically avoid the rear-sensor runway required by many Doppler radar monitors. Examples include Garmin R50 and some SKYTRAK or Square systems. That does not automatically make them suitable for every shallow room; examine each device’s hitting area and the necessary safe ball-to-screen distance.
Do left-handed golfers need more width?
Not inherently, but a room that serves both handednesses may need more room or a layout that avoids frequent sensor movement. A one-sided hitting position that works for a right-handed golfer can be uncomfortable for a left-handed player. Check the full swing arc and the monitor’s ability to track both setups.
Can I put a projector directly above the ball?
Only if it can be mounted outside the entire swing and ball paths and conforms to the projector manufacturer’s mounting conditions. Many common installations place the projector in a safer location determined by throw ratio and screen width rather than directly above the hitting point.
Does a wider screen improve launch-monitor accuracy?
No. A screen changes the safe capture area and projected image, not the monitor’s underlying data quality. Device alignment, proper ball flight, lighting and accepted ball types are more relevant to shot measurement.
Final recommendation
Measure the room before choosing a launch monitor. A 9–10 ft unobstructed ceiling is a useful general planning target, but it must be confirmed against the actual players’ swings. For rear-radar devices, calculate the full sensor-to-screen distance from the current manual and add real screen clearance. For side-camera devices, use the correct side placement and hitting-zone dimensions rather than copying a radar layout.
The most expensive mistake is buying an attractive screen or premium monitor before establishing whether the room is physically safe. Once you have a measured layout, compare hardware in Best Indoor Golf Launch Monitors, choose a complete system from Best Home Golf Simulators, or look at a staged build in Best Budget Golf Simulators.