
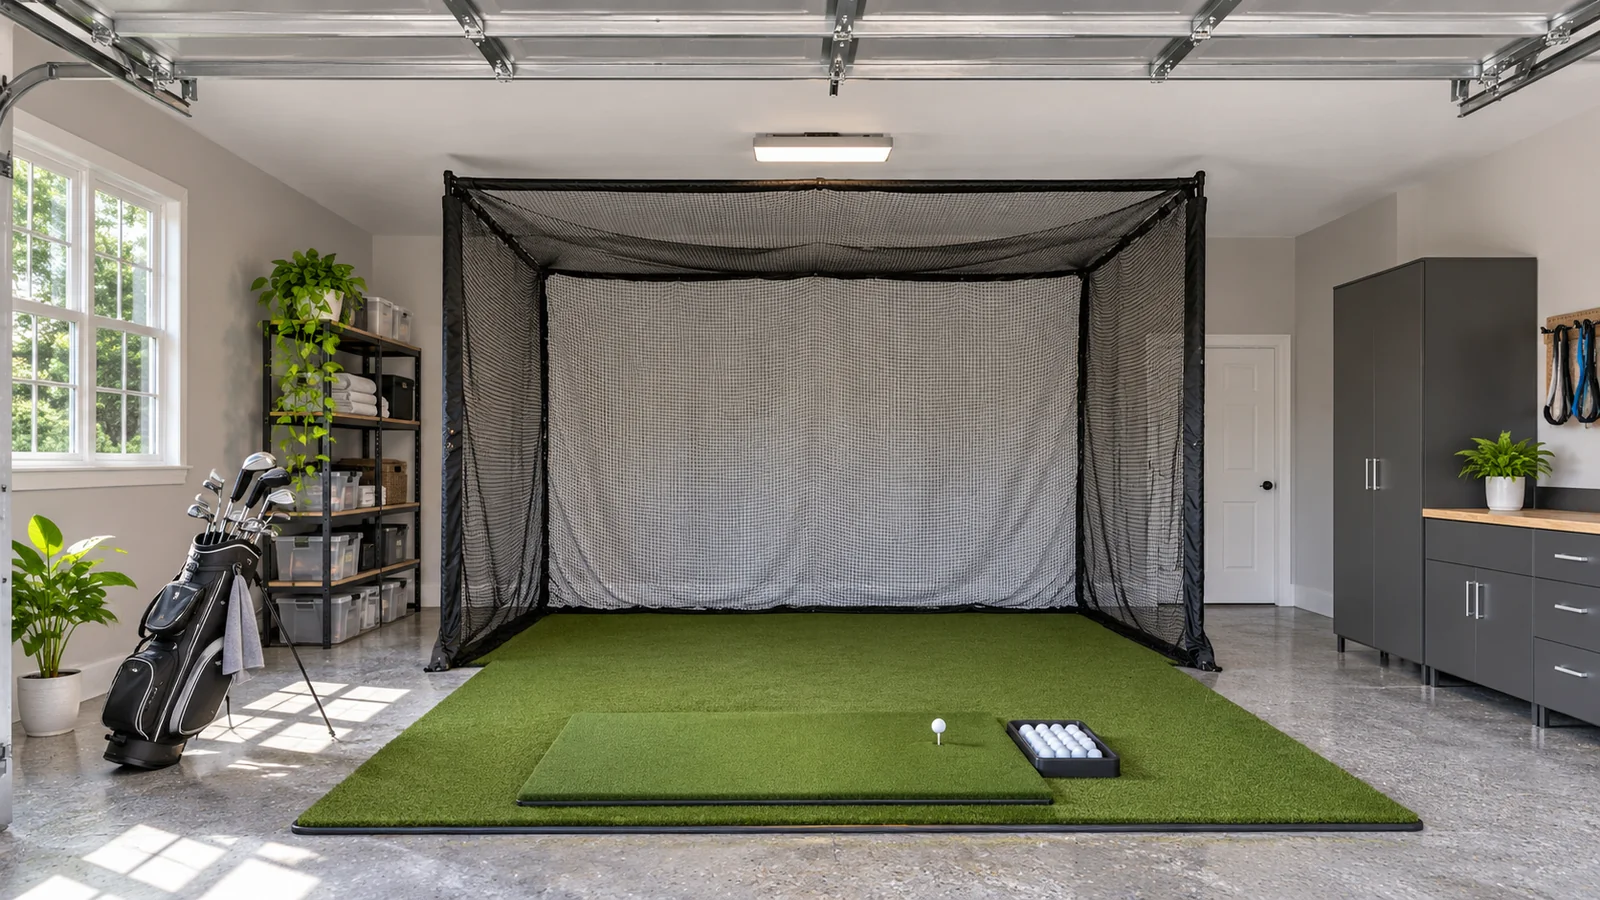
A garage can become a useful home golf practice space, but it is one of the easiest places to misjudge safe swing clearance. The advertised ceiling height tells you little about an open garage door, low rails, hanging lights, storage shelves or how far a monitor must sit behind the ball. This guide follows the order we would use to plan the build on paper: measure the actual obstacles, select the technology, design ball containment, then consider a projector and cosmetic upgrades. It is not a building-code inspection or proof of a safe installation; mounting and electrical work may require qualified tradespeople. For shopping picks, see the separate home simulator buying guide.
Quick verdict: Measure the garage in its actual playing configuration before purchasing equipment. A screen or net with complete containment comes before a projector. If the room lacks radar depth, a suitable side-positioned camera monitor can change the layout, but it does not eliminate the need for swing and rebound clearance. Keep one plan for a car-sharing garage and a different plan for a permanent studio.
Garage setup worksheet: what to measure before buying anything
| Measurement or condition | What to record | Why it matters |
|---|---|---|
| Usable floor depth | Clear distance from safe monitor position through hitting spot to net, including net setback | Rear radar may need more room than a garage appears to offer |
| Real swing clearance | Highest club arc with mat installed; both handednesses if relevant | Ceiling rails, lights and door hardware can enter the swing path |
| Side and overhead containment | Distances to exposed walls, windows, people and equipment | Shanks, pop-ups and ricochets are not stopped by a narrow front net |
| Garage operating conditions | Door positions, vehicle storage, electrical outlets, moisture and ventilation | The room must remain safe and functional outside golf sessions |
| Equipment and software | Exact monitor app, computer, simulator subscription and projector throw | Compatibility and projection are separate from golf ball tracking |
Safety gate: Keep emergency exits, garage door mechanisms, electrical equipment and ventilation unobstructed. Do not strike real balls until an impact-rated containment solution with adequate side, top, behind-net and frame protection has been installed and assessed for the space. If the garage cannot safely support a full swing, switch to a suitable outdoor/range location rather than making the protective system smaller.
At a glance: comparison table
| Option | Good fit | Important trade-off |
|---|---|---|
| Net-first practice bay | Practice carry and speed with a compatible launch monitor, hitting mat and impact-rated golf net | No projected course image; still needs adequate monitoring depth, full swing clearance and side protection |
| Screen-based simulator bay | Indoor practice with compatible simulator software, an impact screen and optional projector | Higher setup complexity; screen impact rating, projector placement, safe enclosure and software licensing all need verification |
| Dedicated garage simulator studio | Frequent practice in a controlled permanent layout with integrated monitor, containment, display and computing equipment | Most demanding of room dimensions, electrical planning, ventilation, ongoing licenses and safe storage of garage equipment |
A garage plan should start with actual usable measurements and safe containment, then calculate how the sensor, projector, computer and equipment storage fit together.
Step 1: Measure the space with the door in both positions
Measure the floor-to-lowest-obstruction height throughout the swing area rather than a single ceiling dimension at the wall. An overhead garage-door opener, rails, lighting fixtures, exposed beams and ventilation ducts may lower usable headroom. BenQ gives 9 feet high, 10 feet wide and 14 feet long as a starting garage simulator planning example, but that is not a universal safe minimum. The player’s height and swing are individual factors.
Make a floor sketch with a measured rectangle: clear length, clear width, and ceiling clearance at multiple points. Mark the door in both the fully open and closed positions, and indicate whether people must walk through the space while it is in use. Measure once with the car parked and once with it removed. A permanent screen may make car parking impossible even if it is narrow enough to fit beside the walls.
Before hitting a ball, do a controlled practice swing with a driver under supervision and with no bystanders. If there is doubt about club clearance, do not proceed. A wider enclosure will not fix a low obstruction.
Step 2: Decide whether the garage is temporary or dedicated
A dedicated room can support a framed enclosure, mounted projector, computer station, cable management and fixed lighting. A temporary garage needs components that can fold or move without repeatedly changing the critical sensor alignment and safety buffers. A practice net and portable monitor may be the better choice if the car must return each evening. If the garage doubles as storage, ensure swinging clubs cannot hit shelving, tools, ladders or doors.
A common mistake is to plan a permanent five-foot-deep enclosure and then discover the garage door, bicycle rack or refrigerator cannot be used. For a portable room, favor a floor marking system that restores the mat and sensor to their measured positions. Photograph the setup with measurements, not merely with appealing decoration.
Step 3: Choose radar or side-camera tracking around the available depth
Rear radar units occupy space behind the ball. Garmin specifies the Approach R10 at approximately 6–8 ft behind the ball and at least 8 ft between ball and net; the straight-line sensor-to-net run is therefore around 14–16 ft before screen backstop and any additional safety clearance. That can be a poor fit in a shallow single-car garage. Rapsodo MLM2PRO similarly specifies rear distance and adequate ball flight. Check each individual manual, because an advertised portable device is not necessarily a compact indoor device.
A side camera such as Square Golf Home can reduce the rear-sensor footprint, but it requires its own hitting zone, stable indoor lighting and safe side clearance. Square’s Home Edition is indoor-only and is not interchangeable with its Omni model. Also consider how frequently right- and left-handed golfers will change places. A sensor that requires repositioning for each stance can complicate group play.
Step 4: Build ball containment before improving image quality
Start with a practice net or impact screen designed to stop real golf balls. Then add side protection, an upper barrier when appropriate, safe treatment for exposed posts, and a plan for balls landing and rolling under the screen. The enclosure has to address shanks and high-lofted shots, not only straight drives. Keep people and pets away from the bay during hitting. A mesh practice net is different from a smooth projection screen; not every net makes a good projected image.
Install according to the seller’s instructions and account for a buffer behind the screen. Carl’s Place specifically discusses rear clearance for DIY enclosures. Do not pull fabric completely taut or fasten it against a hard concrete wall unless the manufacturer permits that method. Inspect anchor points, netting and backstop wear often. A golf ball coming off a rigid exposed metal bar is a foreseeable hazard.
Step 5: Mat, floor and ball position
A simulator mat should let the golfer stand comfortably and keep the ball at the sensor-prescribed height. The mat also needs enough usable hitting area that the same swing can be repeated without accidentally moving the ball into an unsupported zone. Thicker mats can create a level difference between stance and ball platform; address that deliberately. If left and right handed players share the garage, determine whether both can use a common central strip.
For concrete floors, add safe cushioning and protect against slipping, but do not pile loose carpets where the golfer might catch a foot during the swing. Moisture, dust and temperature fluctuations are relevant in garages. Store electronics per manufacturer operating conditions and avoid leaving sensitive equipment in an unconditioned space.
Step 6: Projector, computer and software
Do not choose a projector until the usable screen width is known. Throw distance is calculated as screen image width multiplied by projector throw ratio. A 10-ft-wide image with 0.5 throw needs roughly 5 ft of lens-to-screen distance as a first-stage calculation. With a 0.8 throw, that becomes about 8 ft. The full mounting plan must then account for vertical offset, ceiling rails, wiring, possible shadows, protective housing and the golfer. A floor projector can avoid some rail conflicts but needs shielding and trip prevention.
Choose the simulator software and confirm what it requires: PC operating system, GPU, internet activation, device-specific connector, subscriptions and additional course licenses. A monitor capable of exporting shot data is not automatically authorized to run every third-party golf simulator. Build a connection diagram before buying cables and hardware.
Step 7: Commission the room in stages
First assemble the containment system and inspect it without hitting. Then set a practice ball and verify club swing clearance with everyone out of the bay. Next connect and align the launch monitor using a short club and the maker’s instructions. Confirm that shots are being read consistently before adding a projector. Only when the practice system works should you install a permanent display and fine-tune the enclosure.
Start with a few controlled, lower-energy shots and inspect the screen, side protection, floor and nearby fixtures. If a ball escapes, stop and correct the containment design. Every component should be checked after maintenance, a garage-door repair or a change to the mat height.
Three useful garage layouts
Net-first temporary: portable net, removable hitting mat, rear radar only if its specified depth exists, and shot data on a tablet. This is practical when the space needs to return to car use. Dedicated projected bay: framed enclosure, secure side and upper containment, a matched projector, a permanent hitting station and a compatible PC. This gives a better picture but requires much more clearance and installation work. Shallow camera bay: side-positioned optical sensor and net/screen, with the same safe club and ball containment requirements. This can save rear sensor space while introducing different lighting and multi-player constraints.
There is no single footprint that guarantees all three will work. Record the actual room drawing and manufacturer dimensions; do not borrow a social-media build layout without checking it against your own garage.
When the garage cannot safely be converted
If the ceiling is too low for a full driver swing, garage-door tracks cross the club path, the available net-to-player distance is too short, or safe containment cannot be installed, change the project rather than forcing it. A launch-monitor session on an outdoor range, a supervised training facility or a putting-focused indoor setup may better suit the constraints. Safety is a design requirement, not a feature purchased at the end.
Installation and testing order
First test the club swing path without a ball and with the final mat height. Next assemble impact-rated containment and verify stable anchors, protected hard edges and rear setback. Then align the monitor to its documented lane or capture zone. Only after those conditions are met should you test controlled, low-speed shots, inspect any ricochet or gap behavior and progress conservatively. Add projector and software after the physical system is safe. For ceiling/projector work, building modifications or uncertain electrical loads, hire an appropriately qualified professional.
The room geometry guide separates usable swing space from wall measurements. For a detached room, compare the shed planning example.
Frequently asked questions
Can I fit a golf simulator in a single-car garage?
Sometimes, but the answer depends on clear dimensions, swing height, obstacles, required monitor geometry, containment and whether the garage door must still operate. Measure the lowest obstruction first.
Should I choose a retractable impact screen?
It can help in a shared-use garage, but the support structure, anchoring, retraction path and safe containment still need checking. It is not automatically safer than a permanent screen.
Is 9 feet of ceiling height enough?
Some golfers and layouts may fit, but it is not a universal minimum. The real swing path and any rails or lights can require more room.
Can I mount the projector above the golfer?
Only if a model-specific placement plan shows safe clearance from the club and door mechanism and proper projection geometry. Use a qualified installer if structural mounting is outside your expertise.
Does a garage golf simulator need internet?
Software activation, course updates and membership checks can require internet even when the launch monitor connects locally. Check the exact simulator platform rather than assuming every mode is offline.
Final recommendation
A garage simulator should be designed from the floor plan outward. Measure real obstacles, establish safe ball containment, choose a tracking technology that fits, then add the projector and finishing touches. The equipment is replaceable; an injury or damaged building is not. Use the room-dimensions guide for calculations, the enclosure guide for containment hardware and the budget guide for purchasing trade-offs.